Set up
1) Download the OpenVPN configuration files HERE.
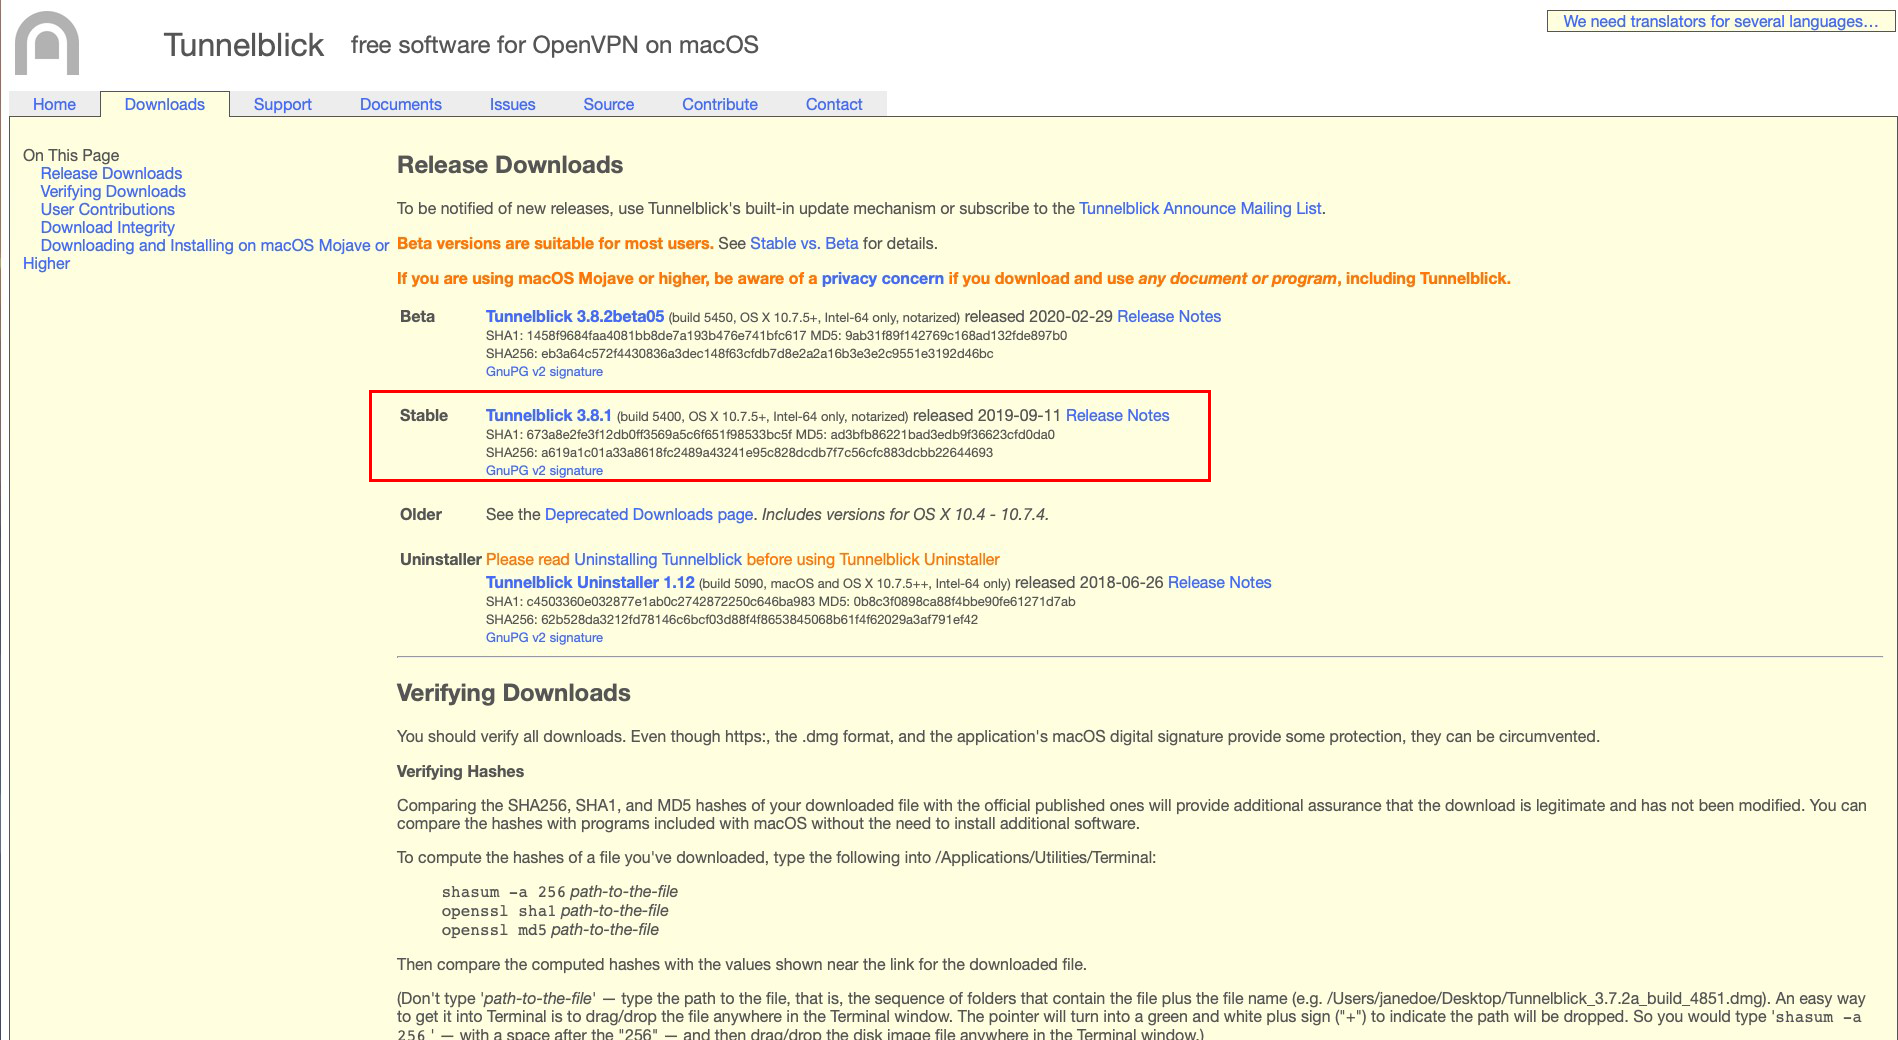
2) Download Tunnelblick from THIS PAGE, choose the Stable version.
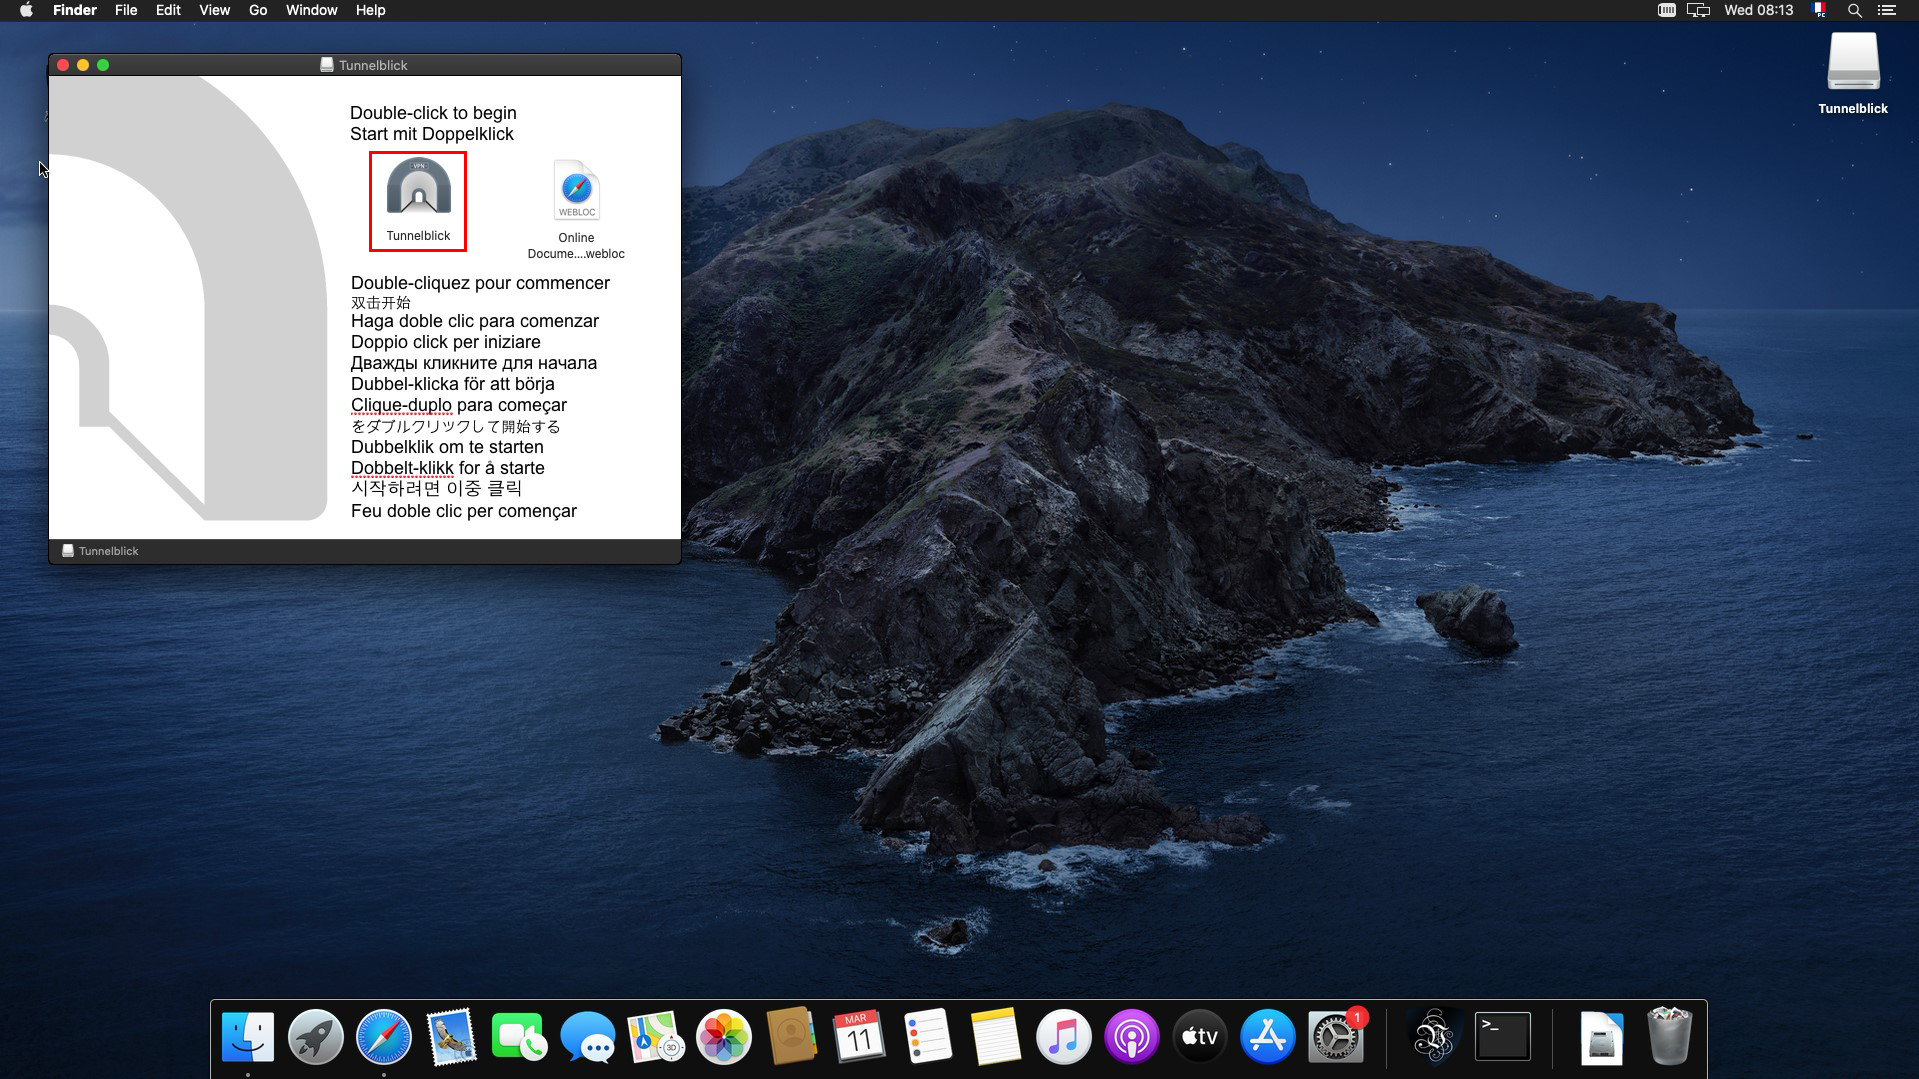
3) Start the Tunnelblick installation by double-clicking on the downloaded file, then, in the installation window that opens, double-click on the Tunnelblick icon.
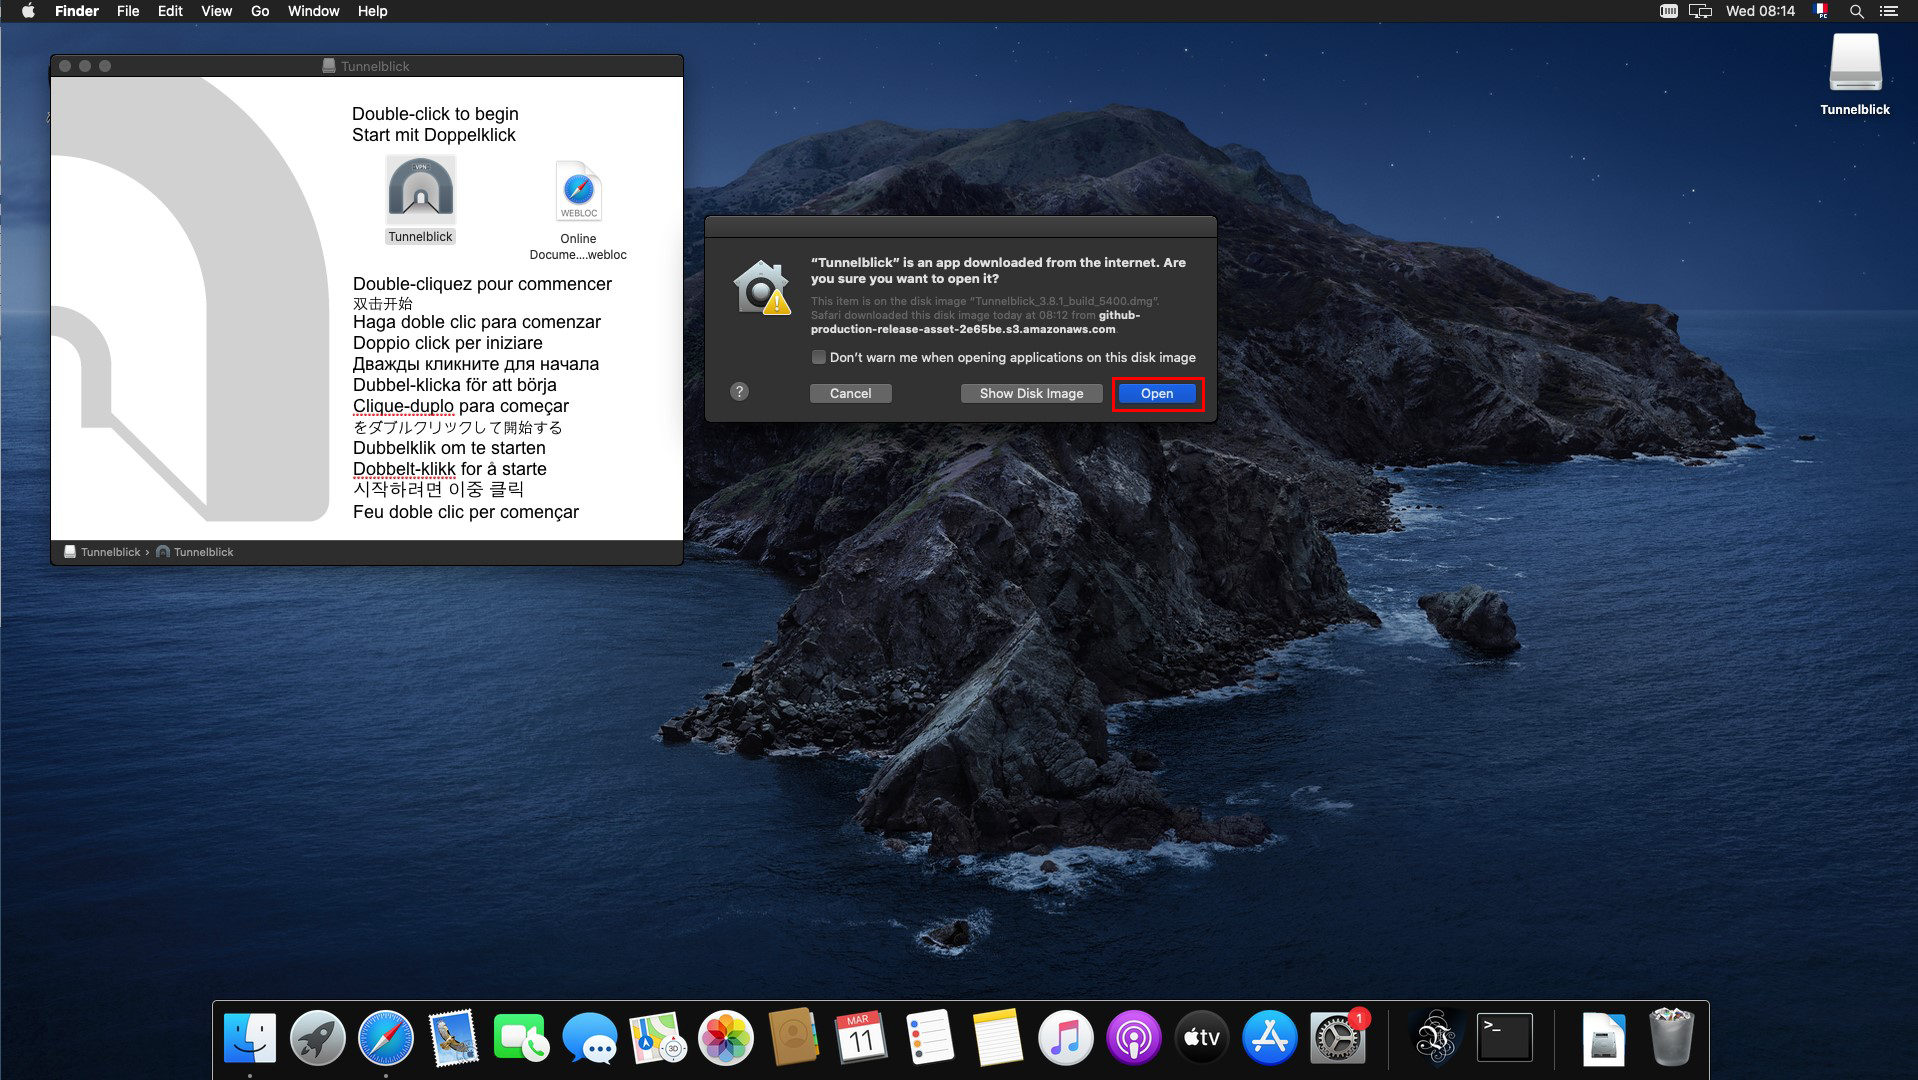
4) Allow the installation of Tunnelblick by clicking on "Open".
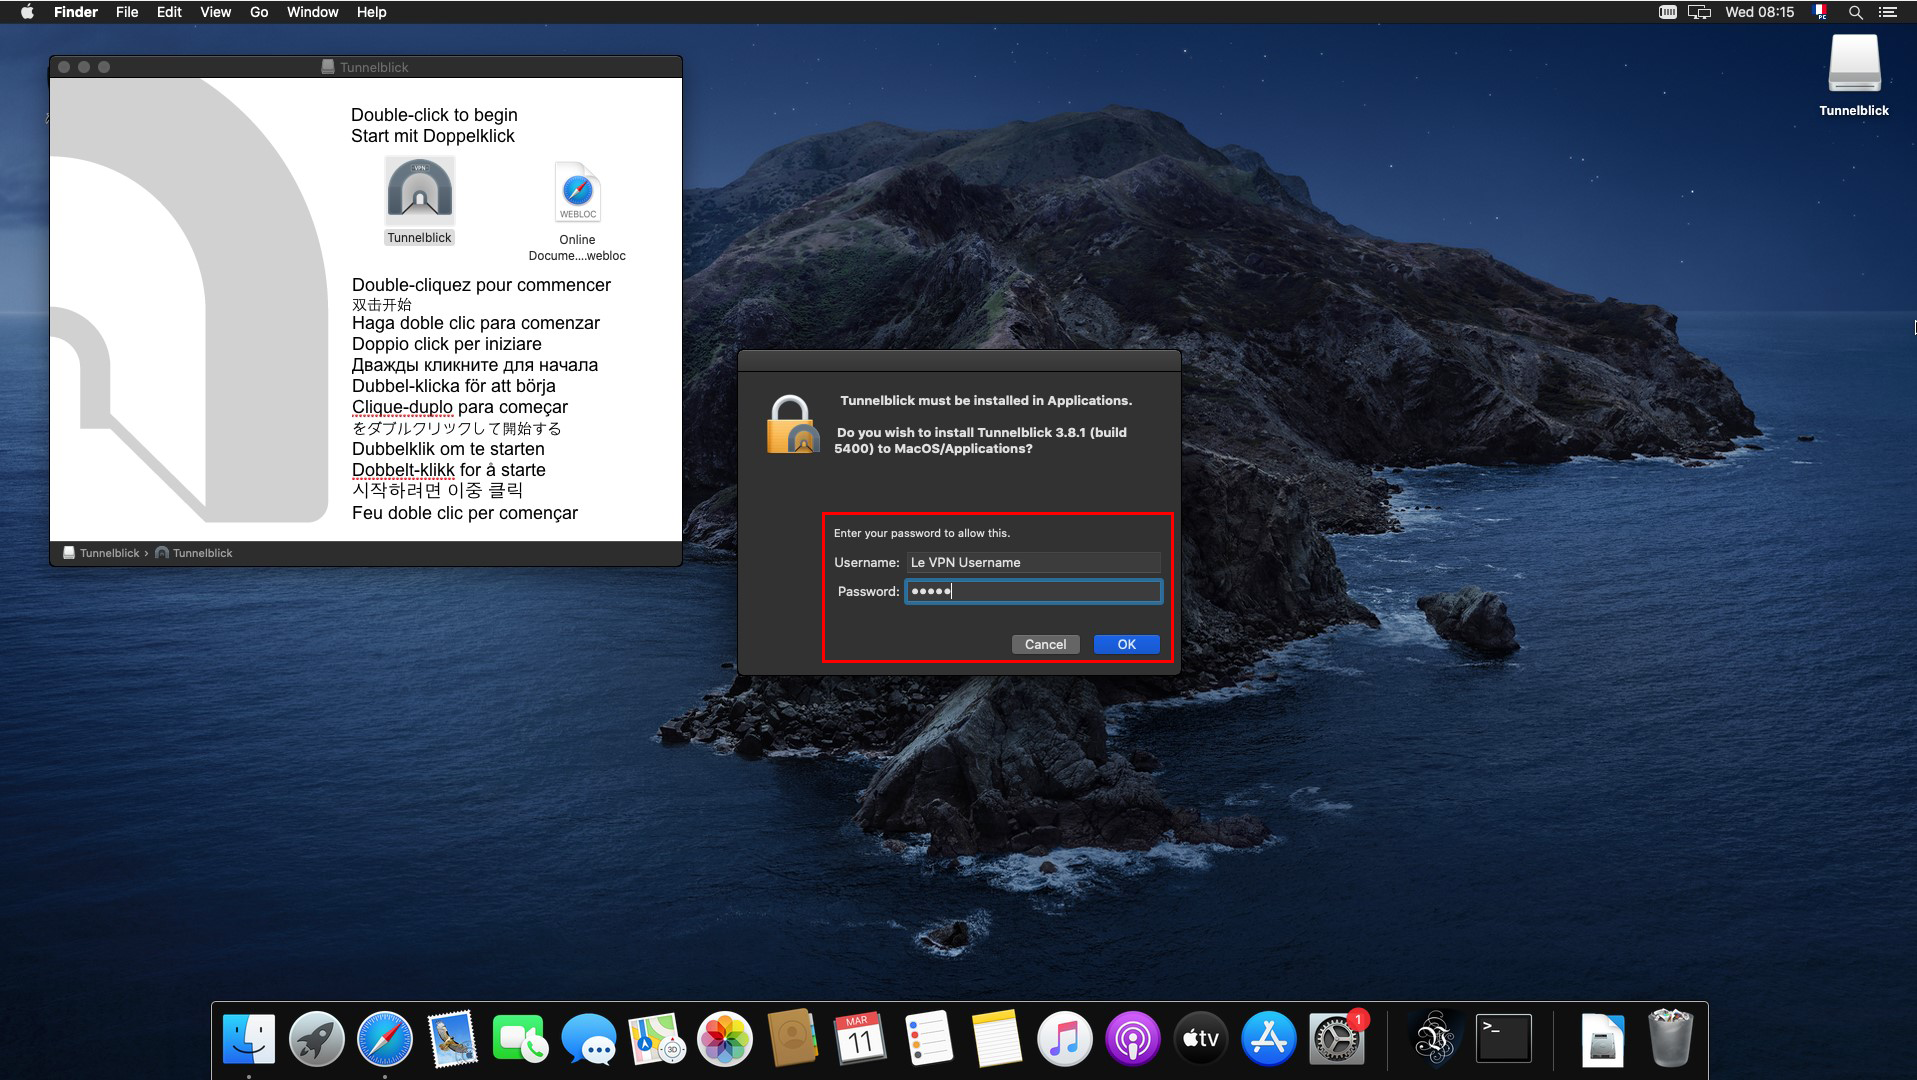
5) Click on "Continue" and enter your macOS administrator password and click "OK".
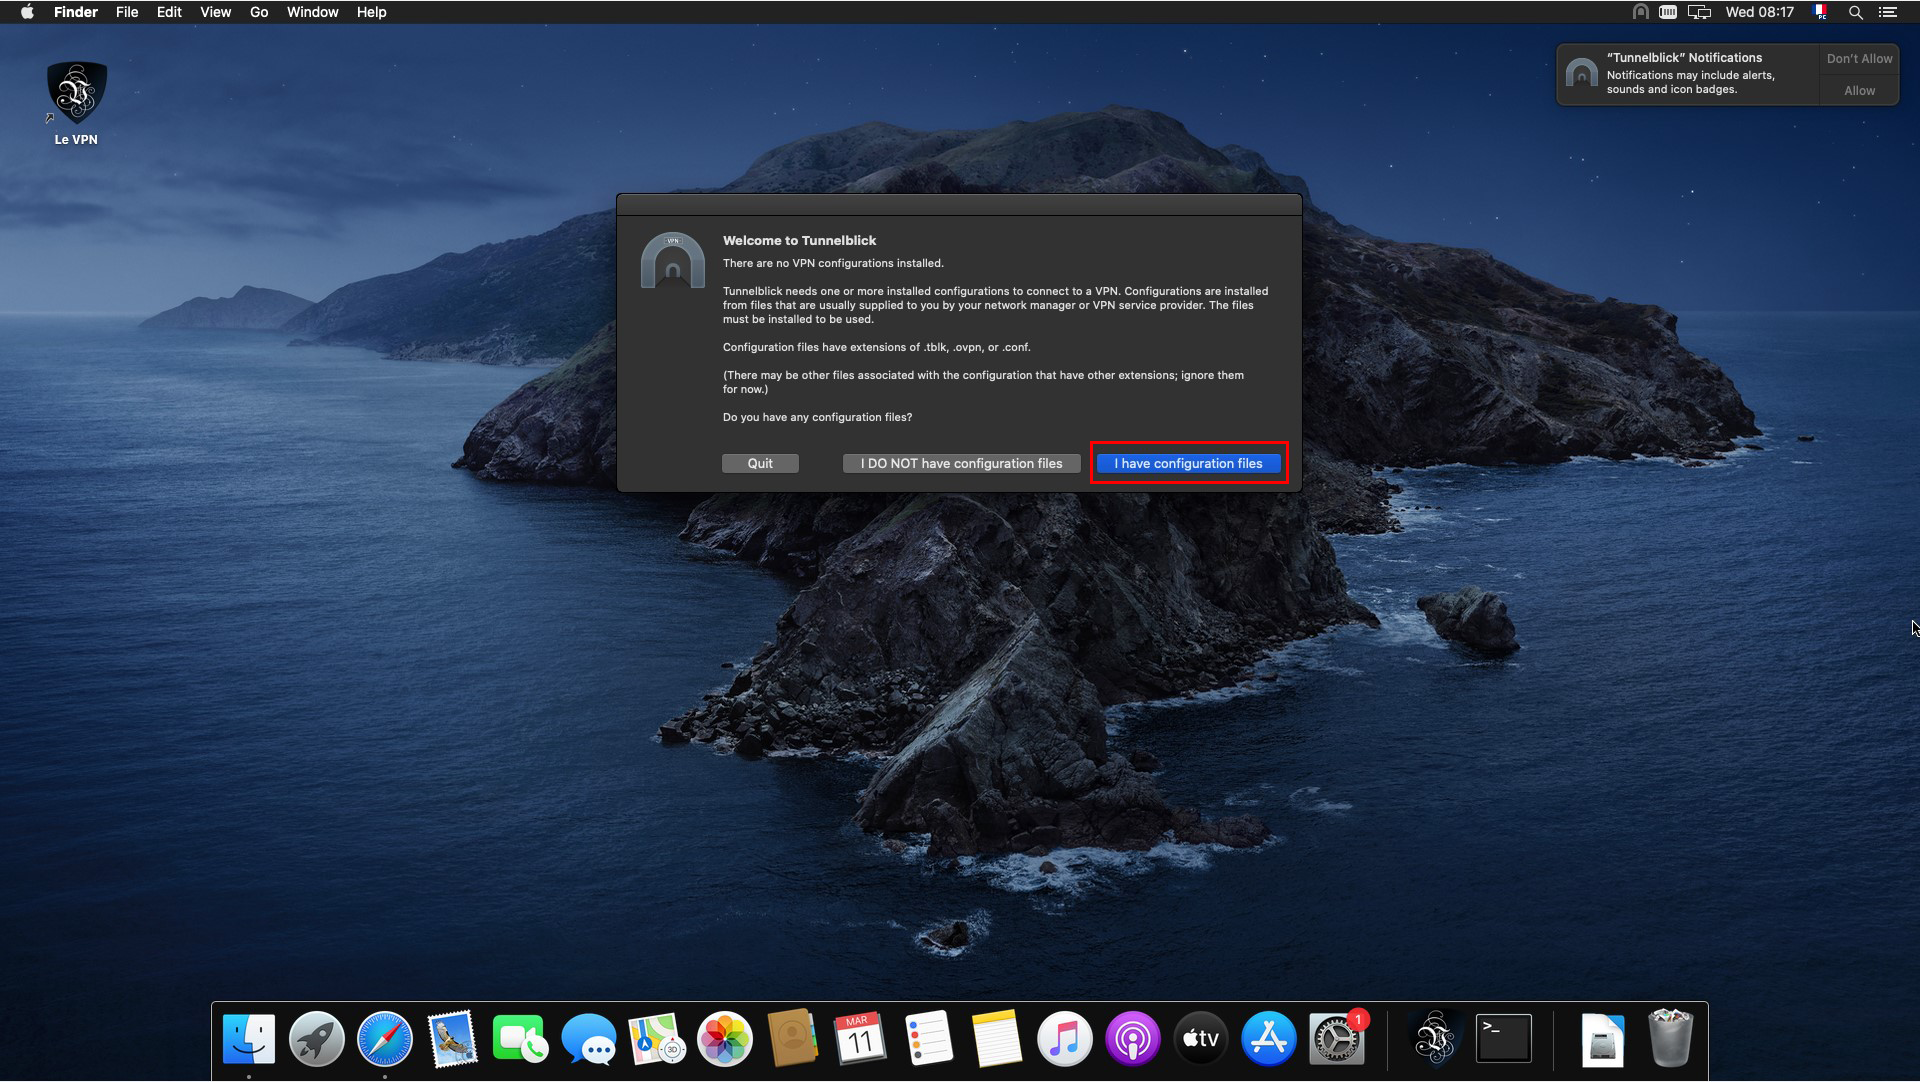
6) Once the TunnelBlick application is installed, a window opens, click on "I have configuration files".
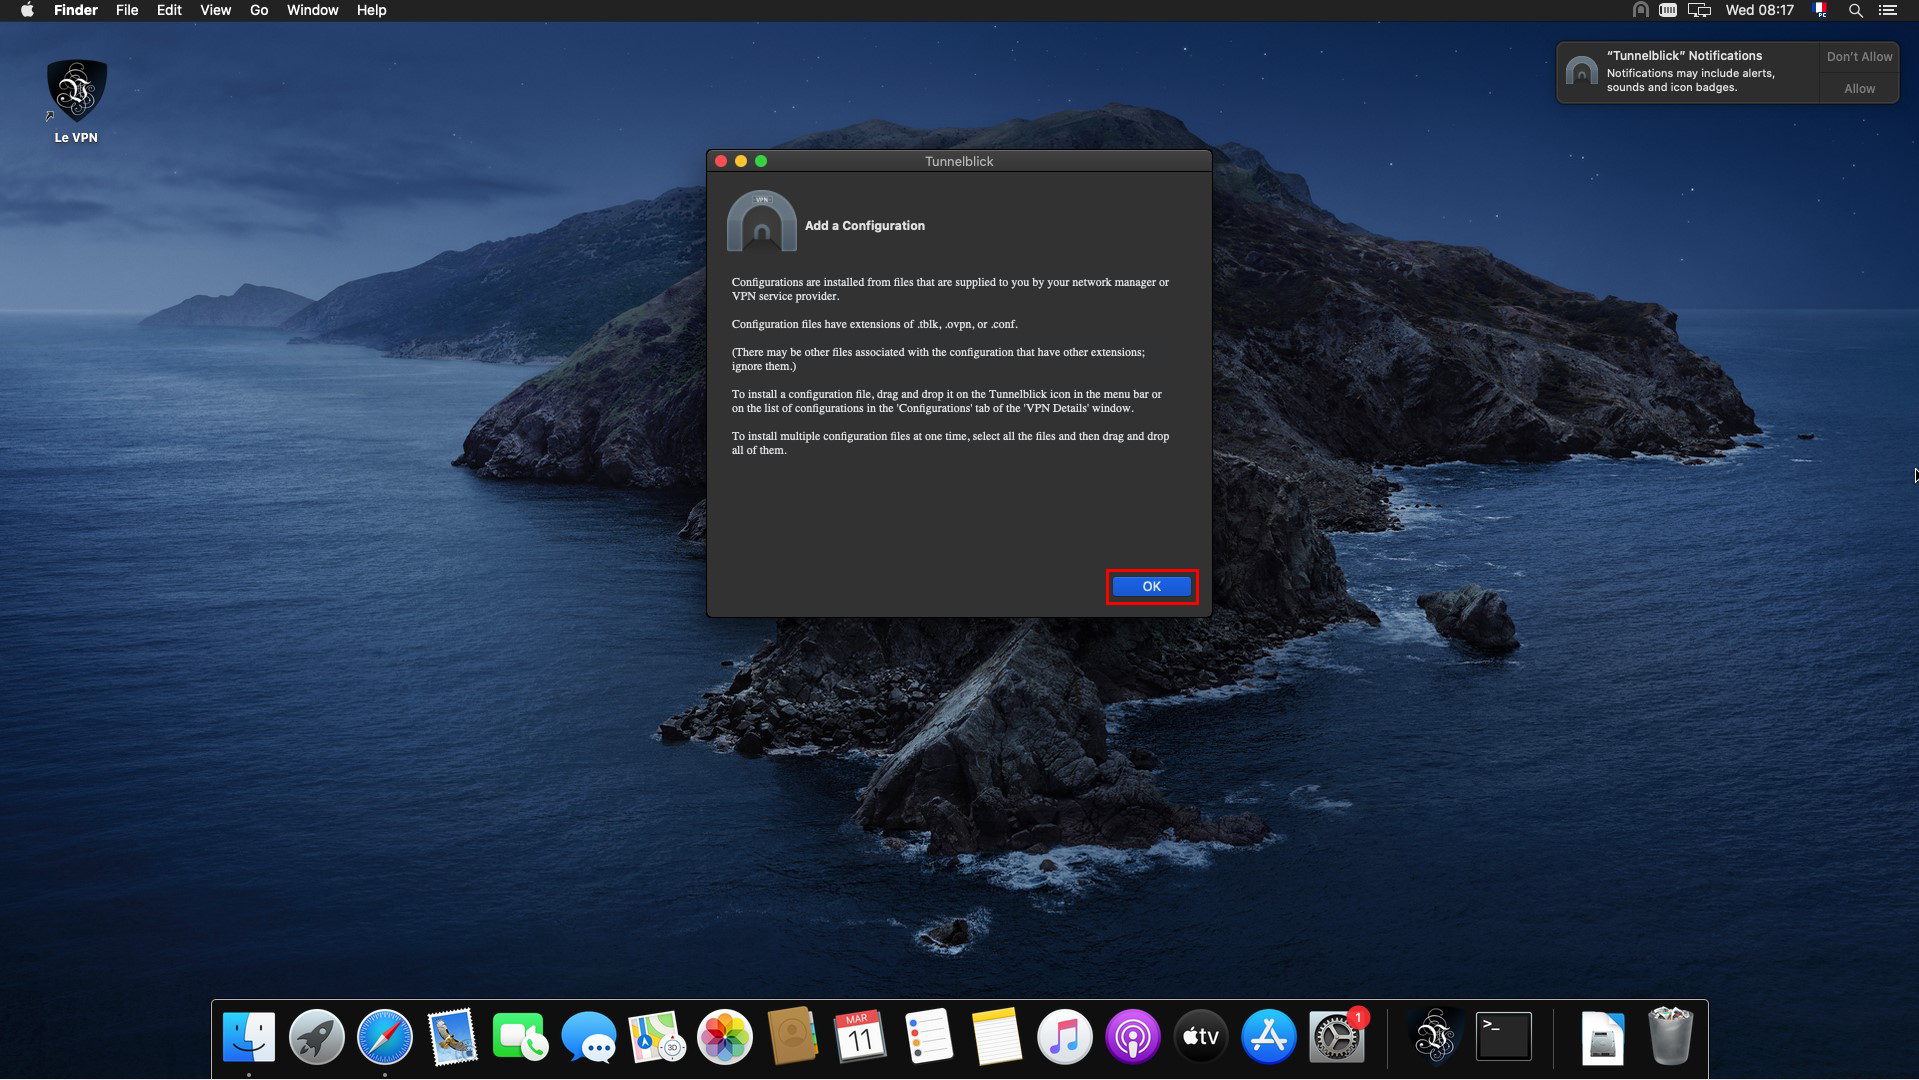
7) In the "Add a Configuration" window, click "OK".
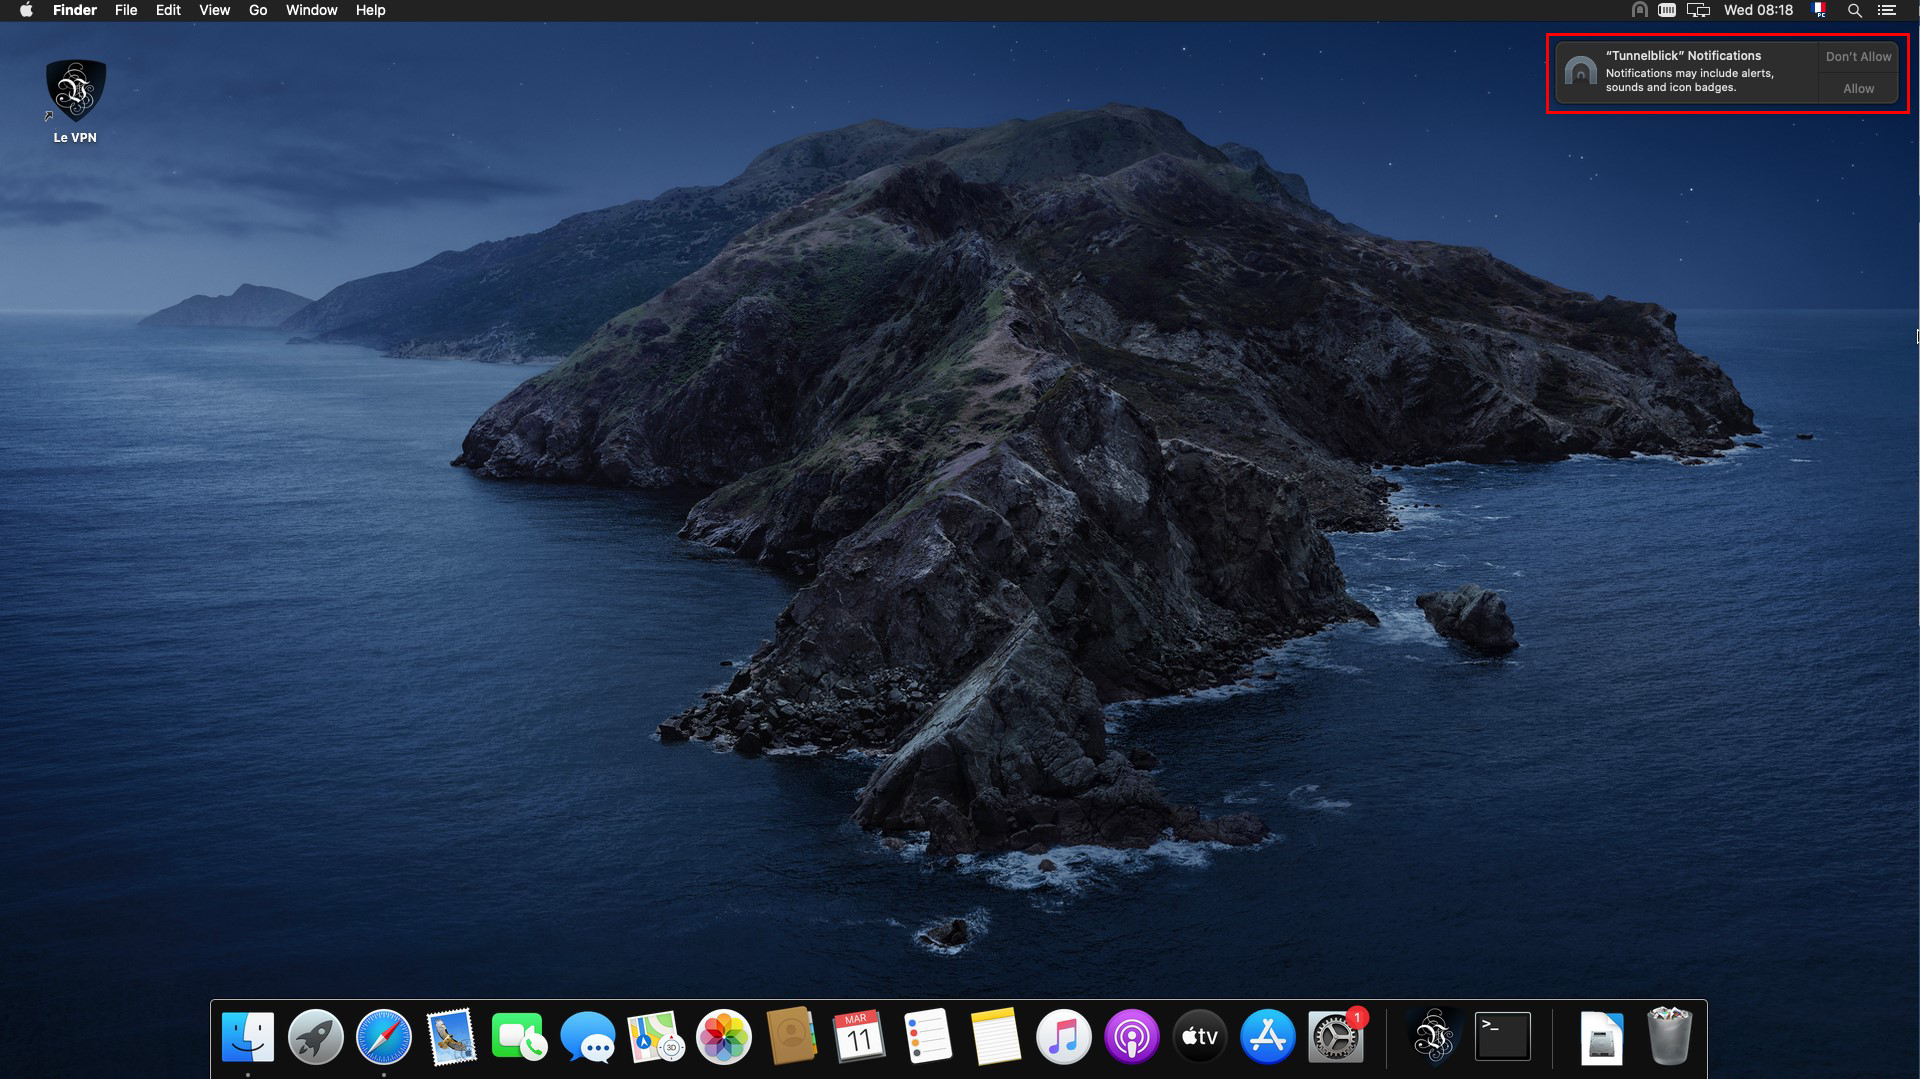
8) Depending on your preferences, you can allow or disallow notifications sent by Tunnelblick.
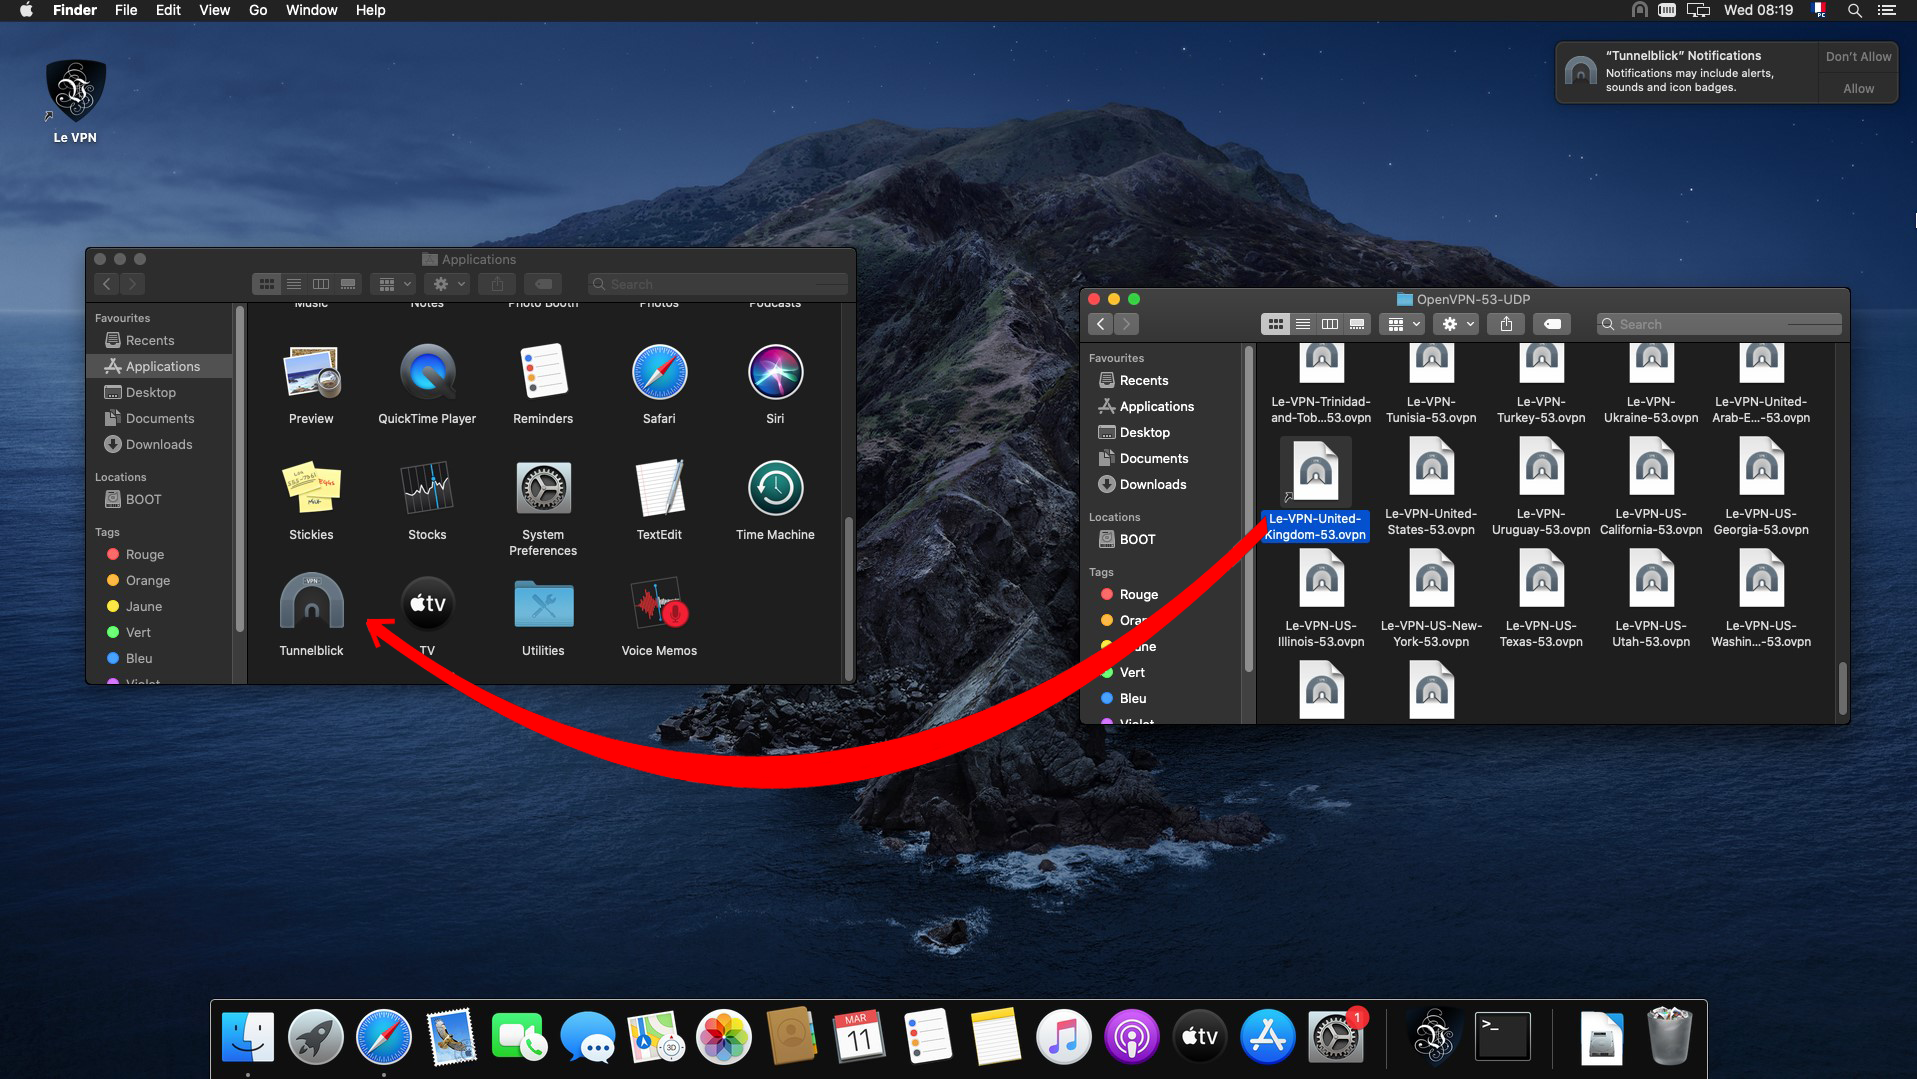
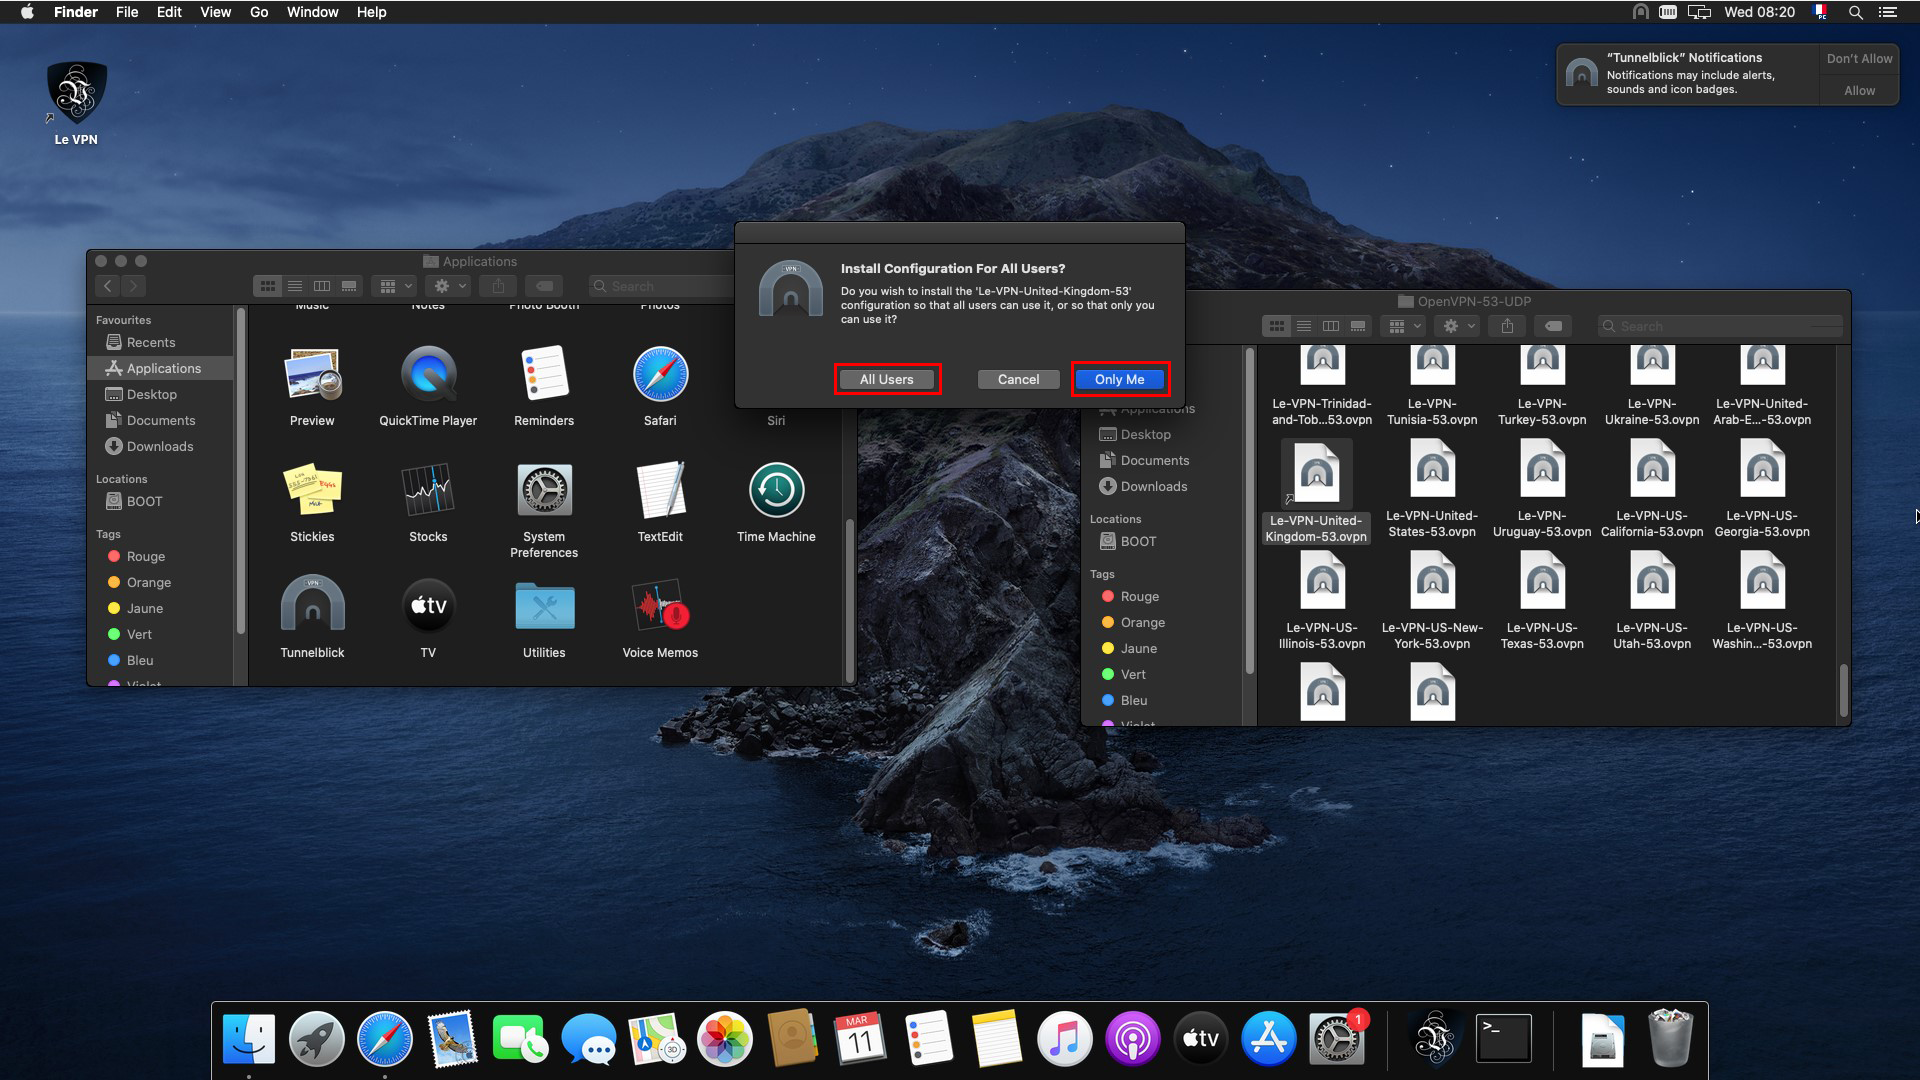
9) Drag and drop an OpenVPN configuration file, from the previously downloaded configuration folder, on the Tunnelblick icon.
10) Tunnelblick asks you if you want to install this configuration for all users or just for you, depending on your preferences, choose one of the two options.
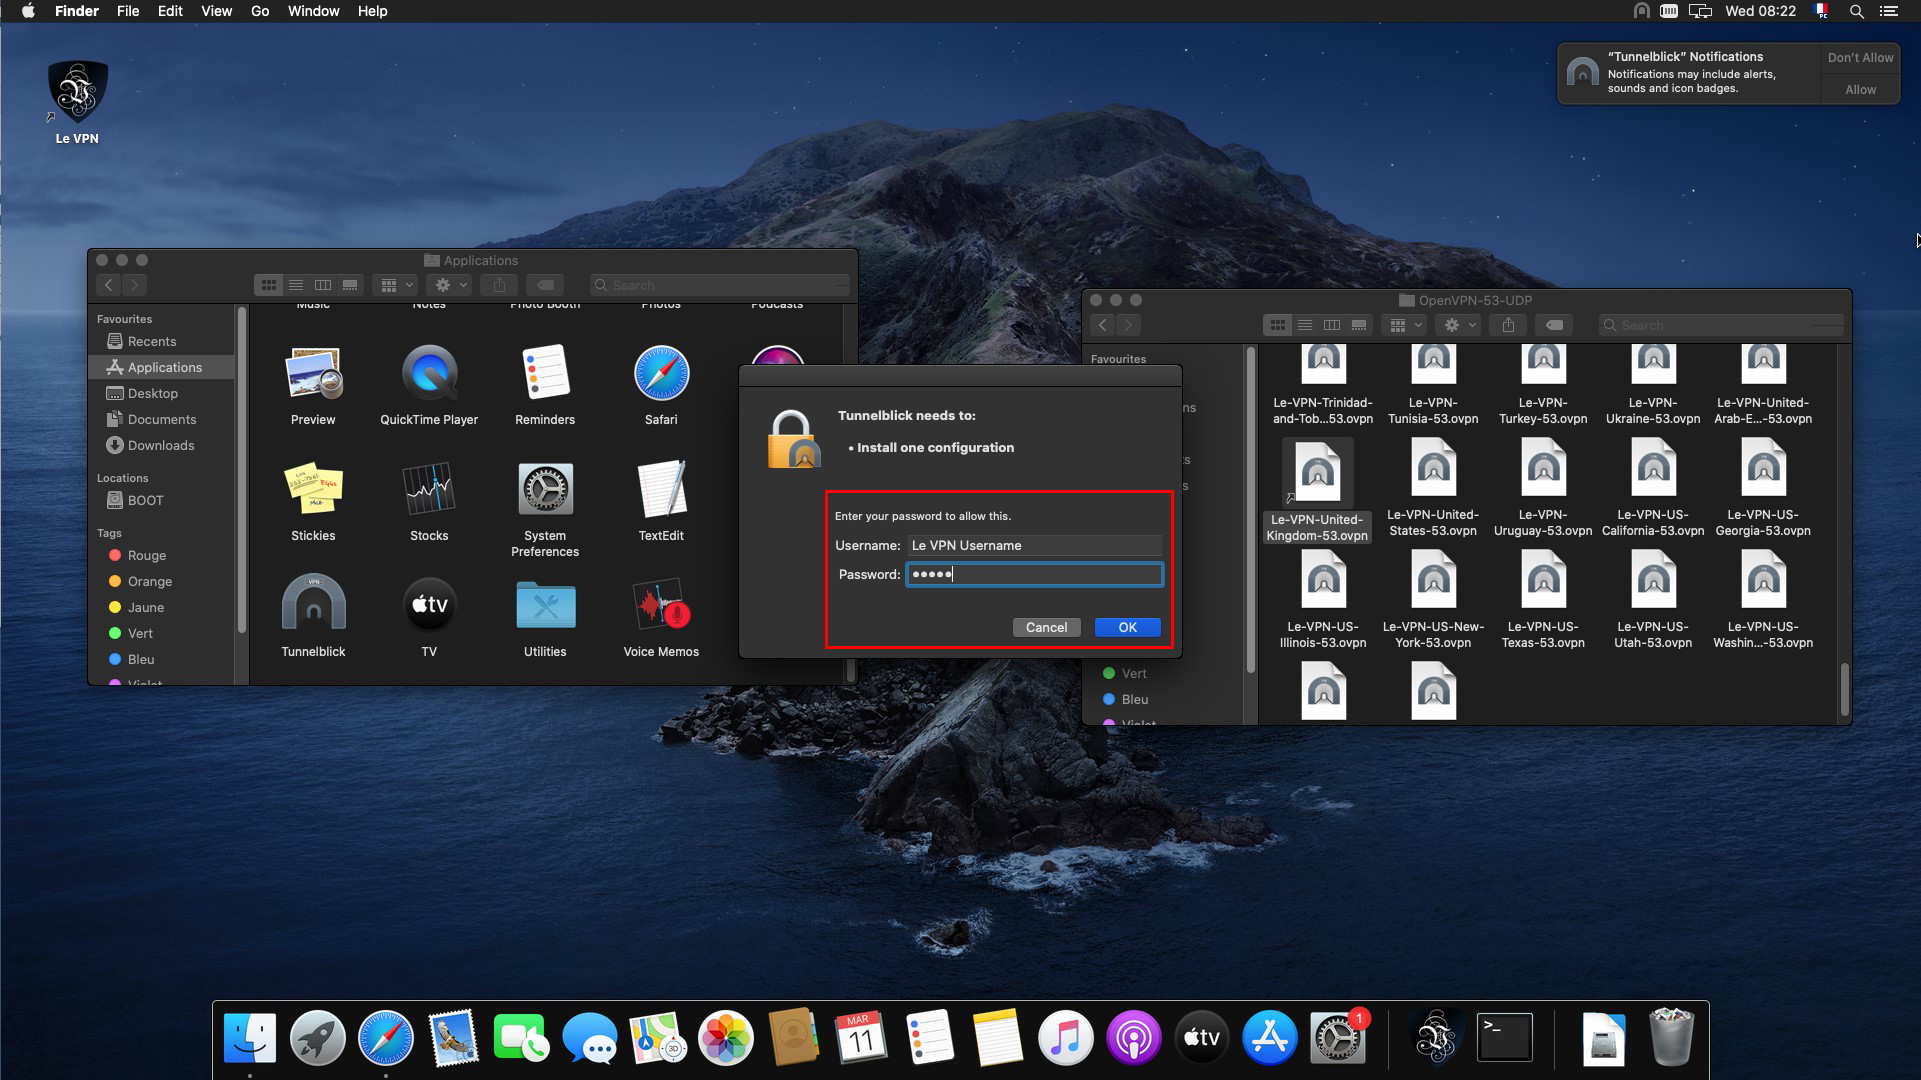
11) Re-enter your macOS administrator password and click "OK".
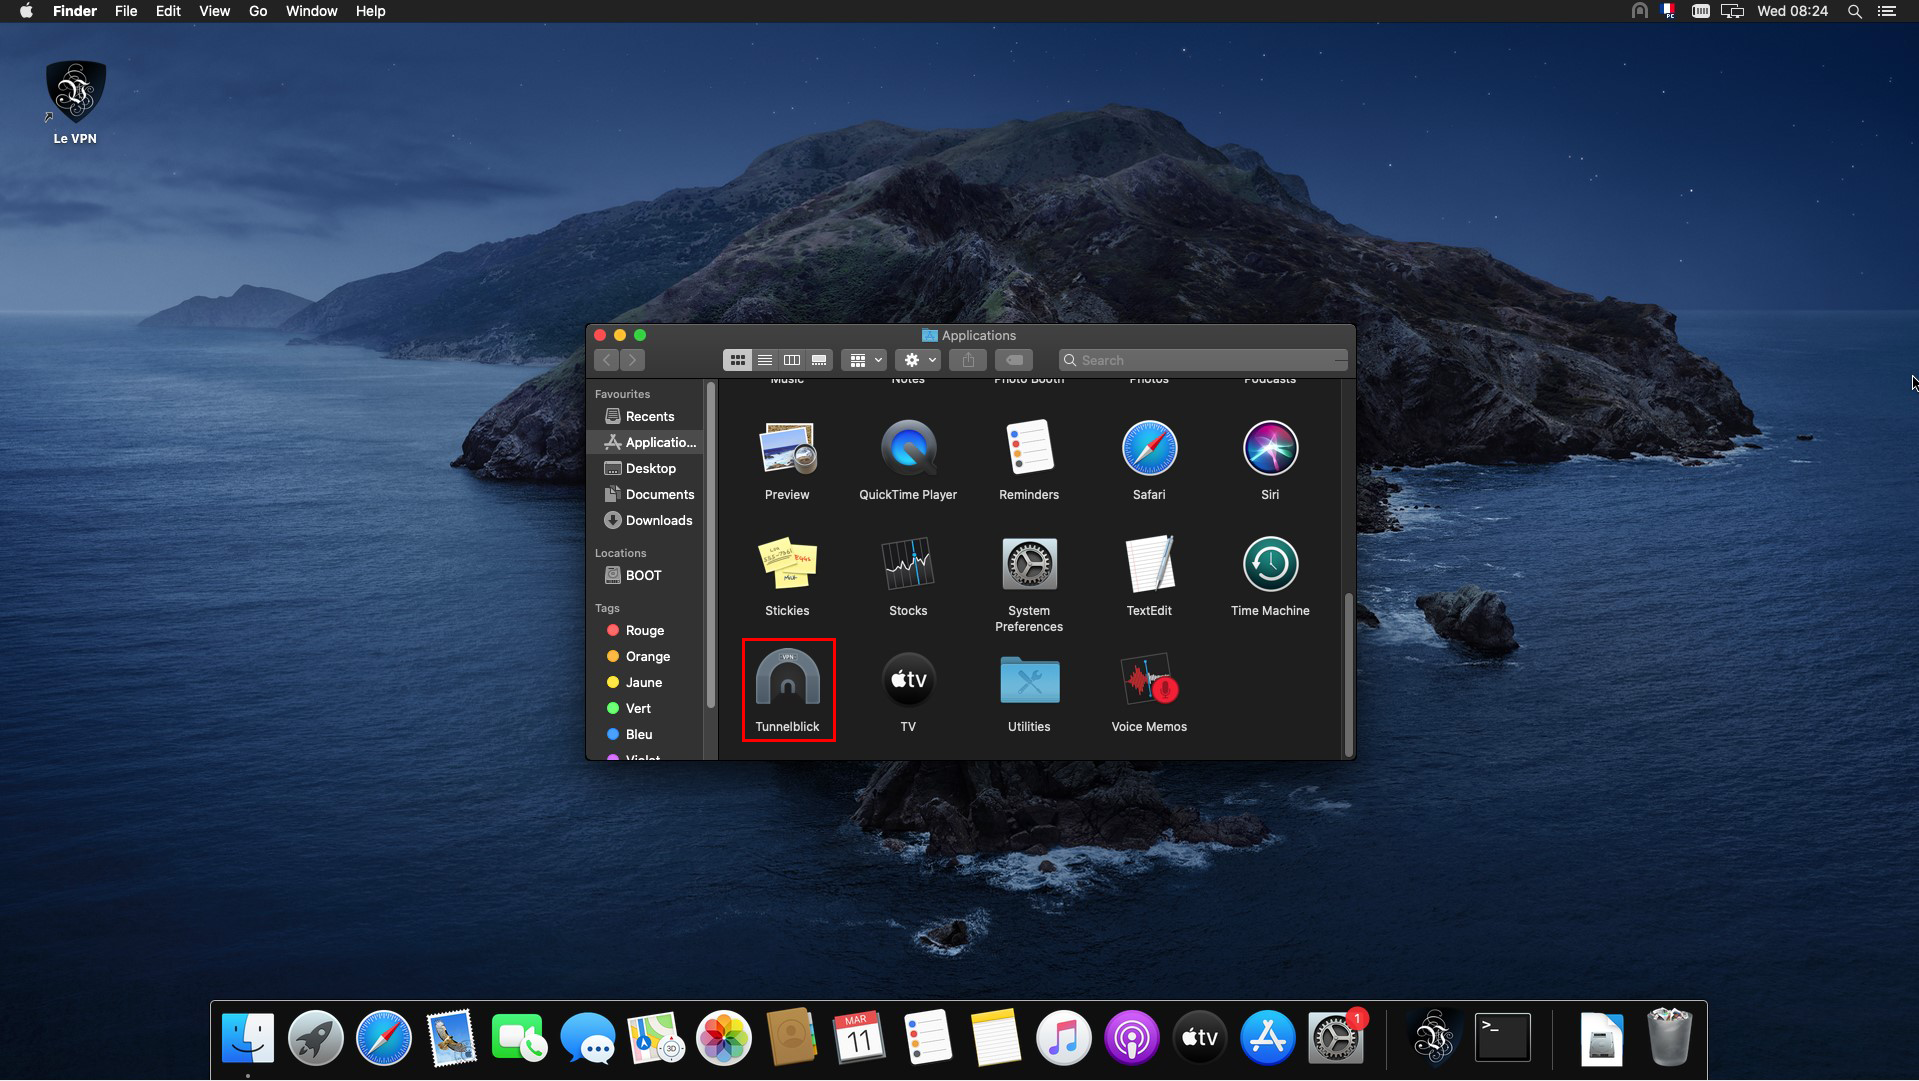
12) Open Tunnelblick by double-clicking on its icon (from the Applications folder).
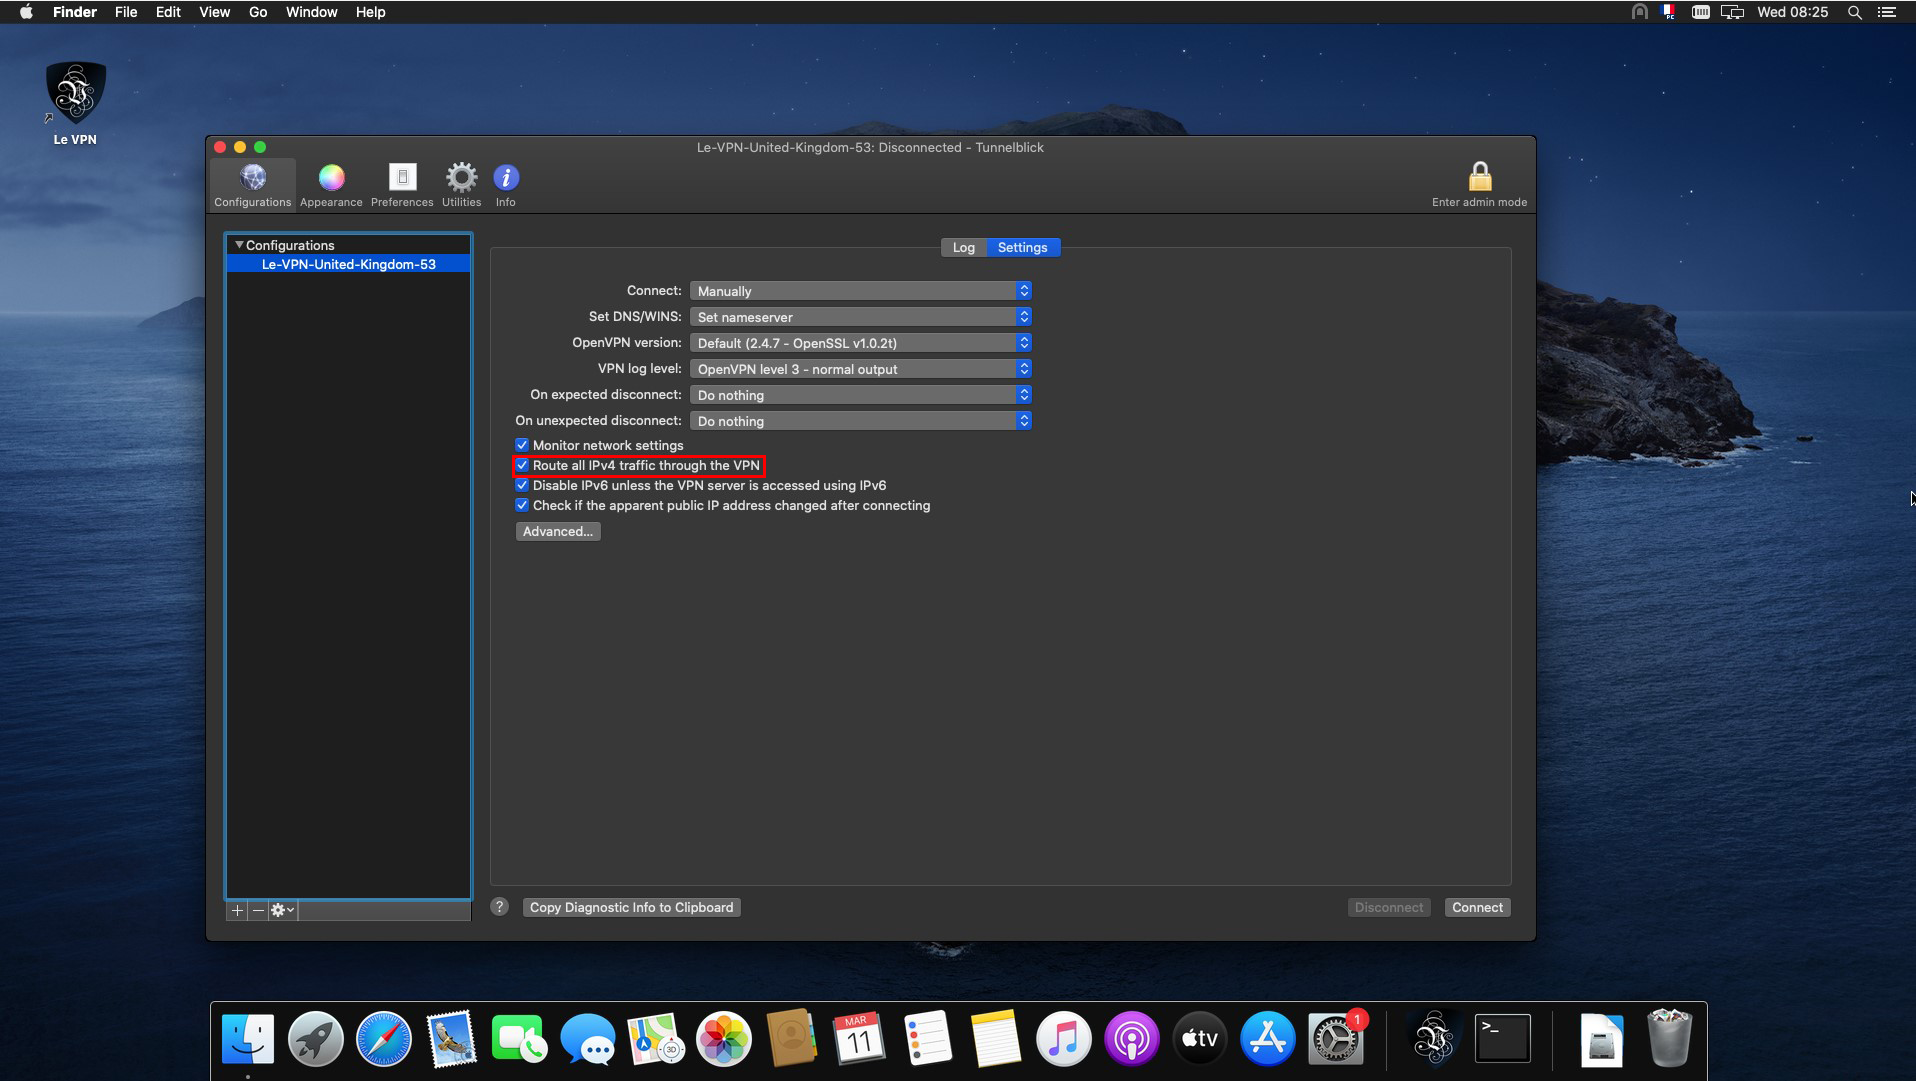
13) Select the configuration you have added (left column), then click on "Settings".
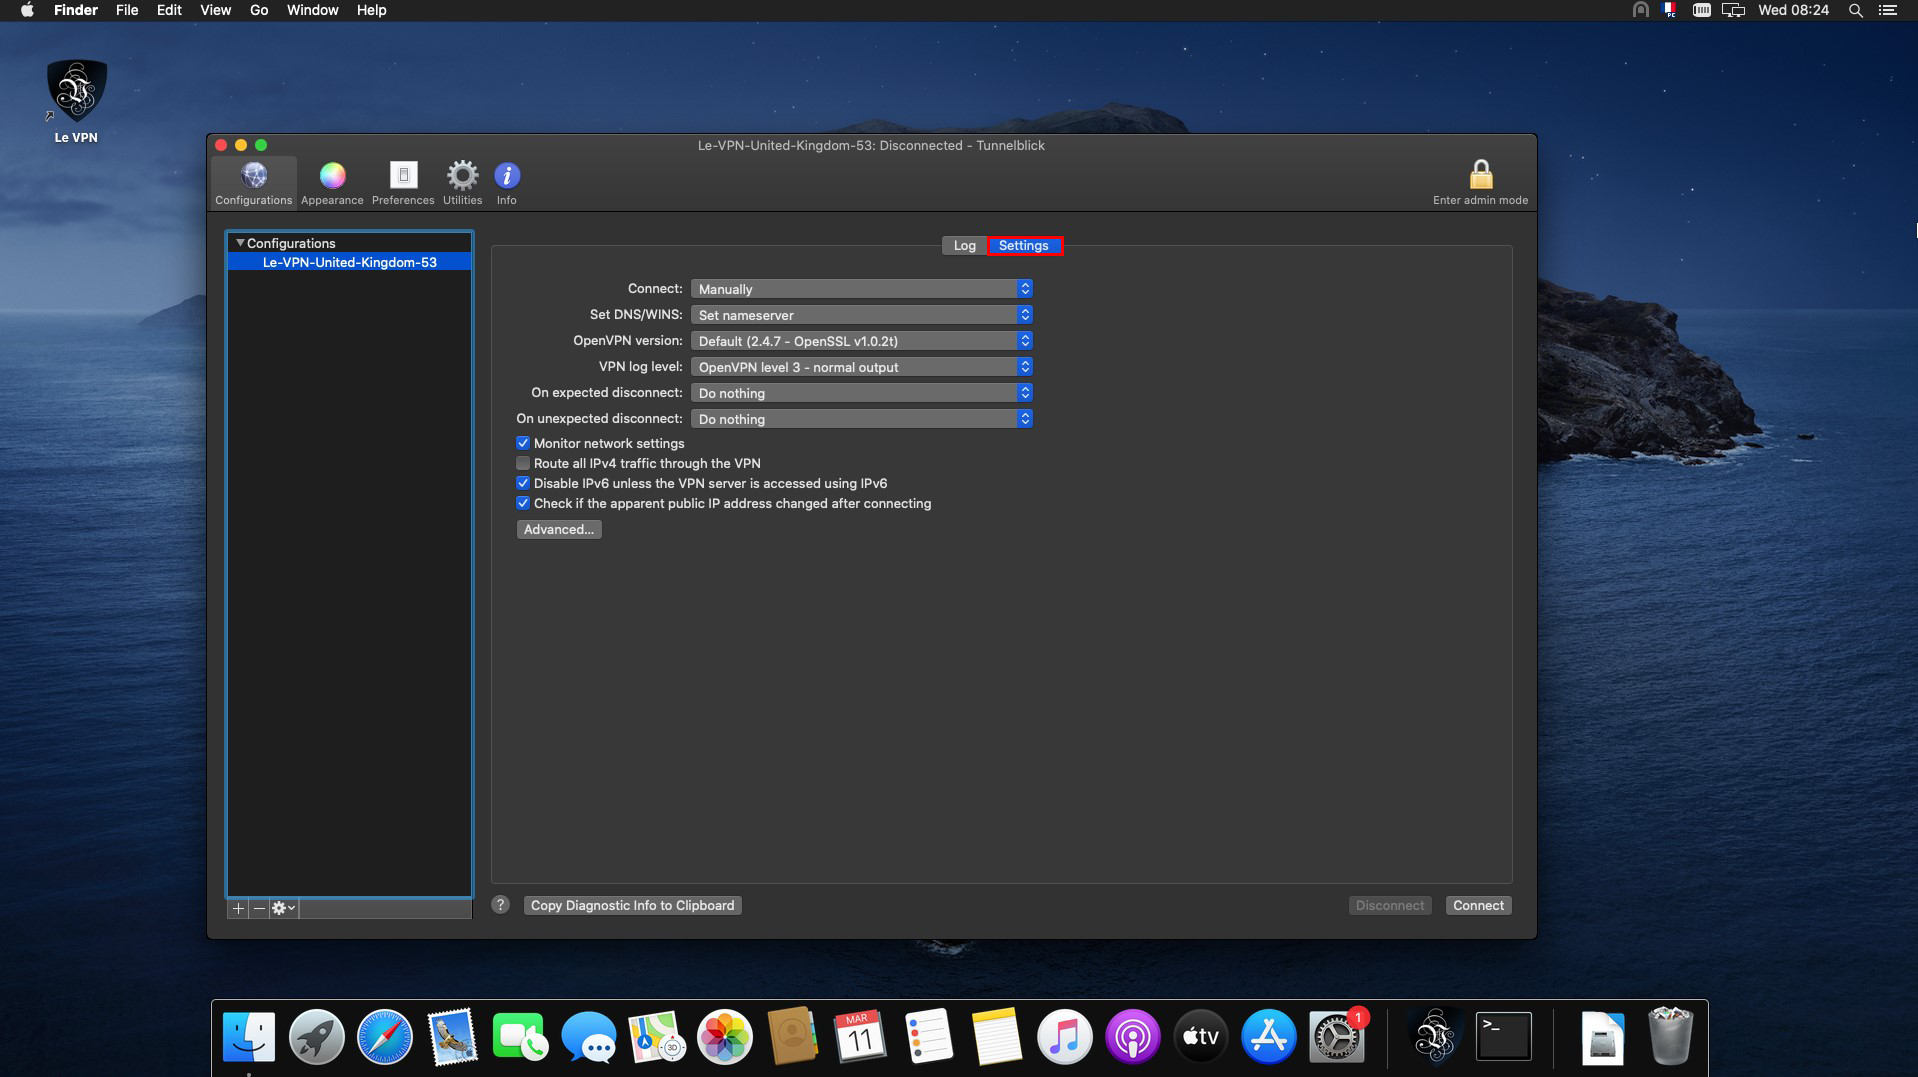
14) In the settings window, check the box "Route all IPv4 traffic through the VPN", then you can close the Tunnelblick window.
Connection
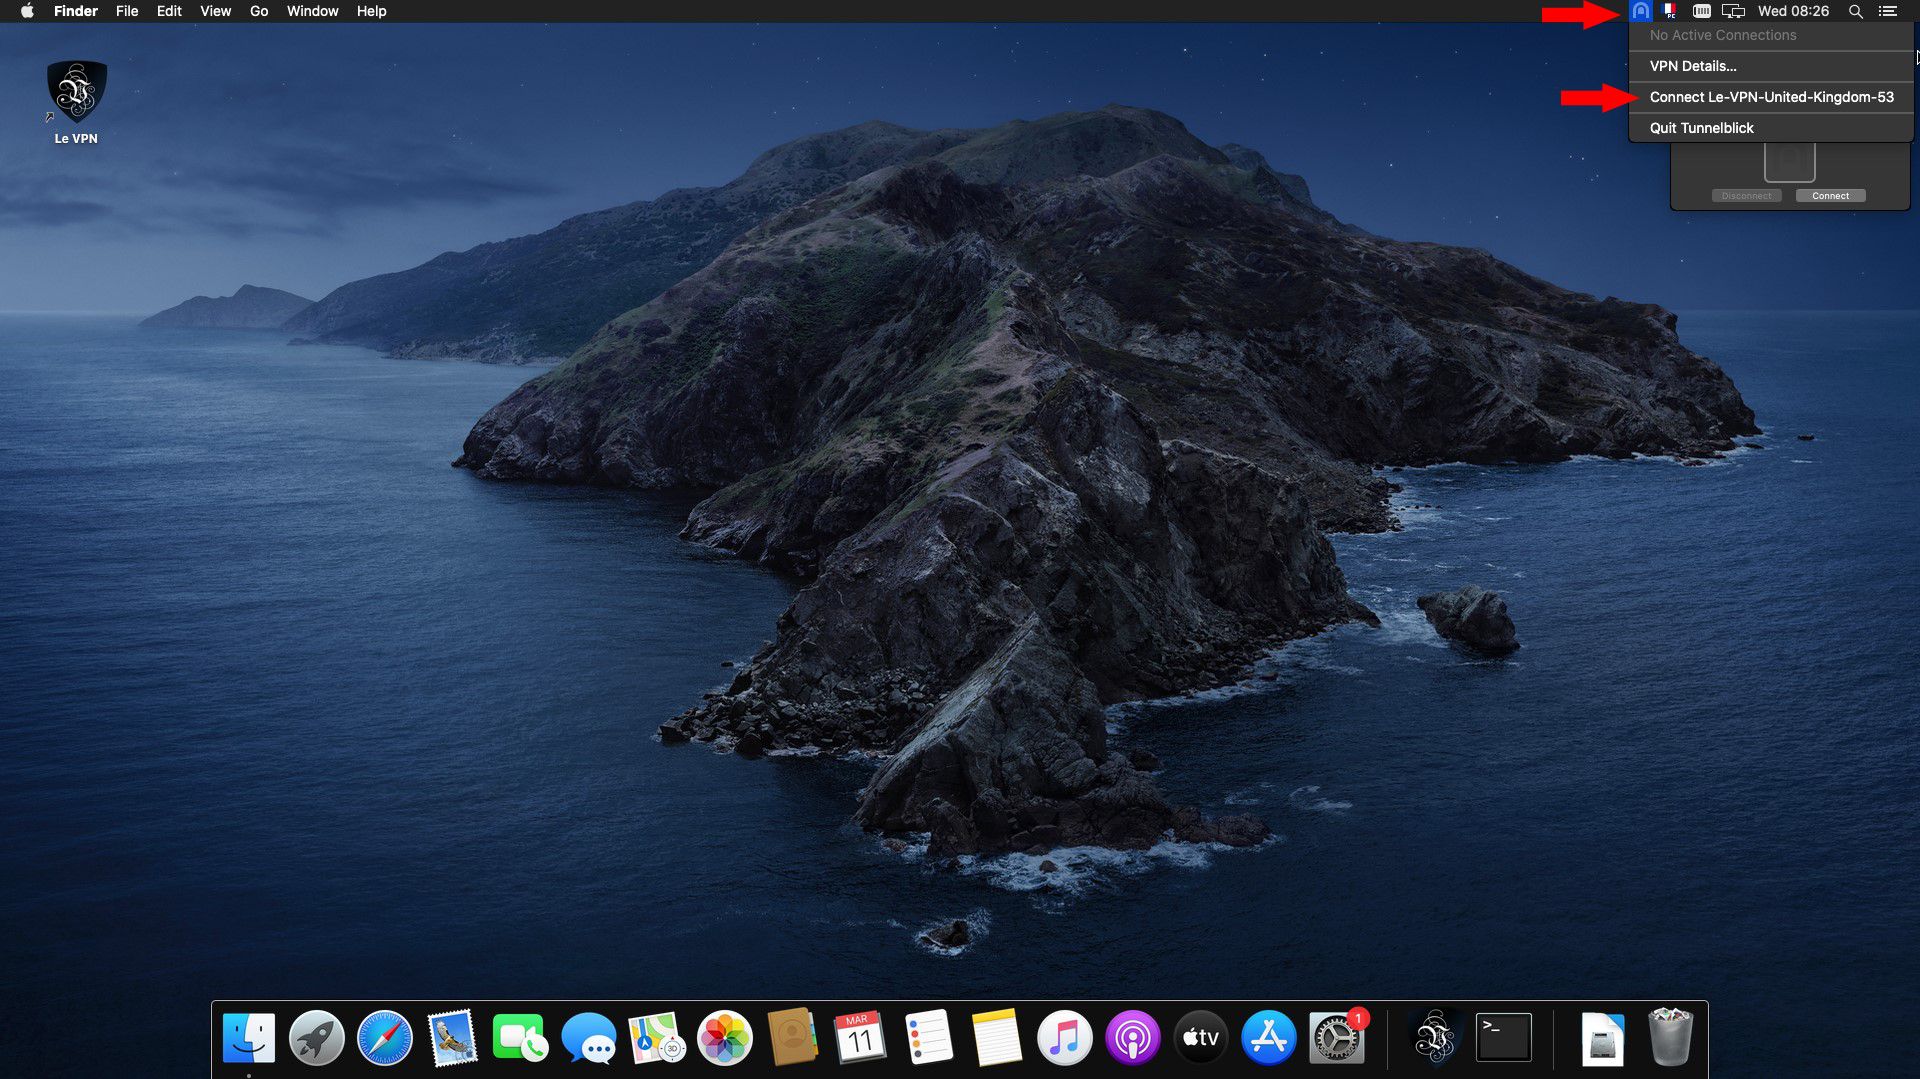
1) Click on the Tunnelblick connection icon at the top of your screen and choose "Connect + Connection Name".
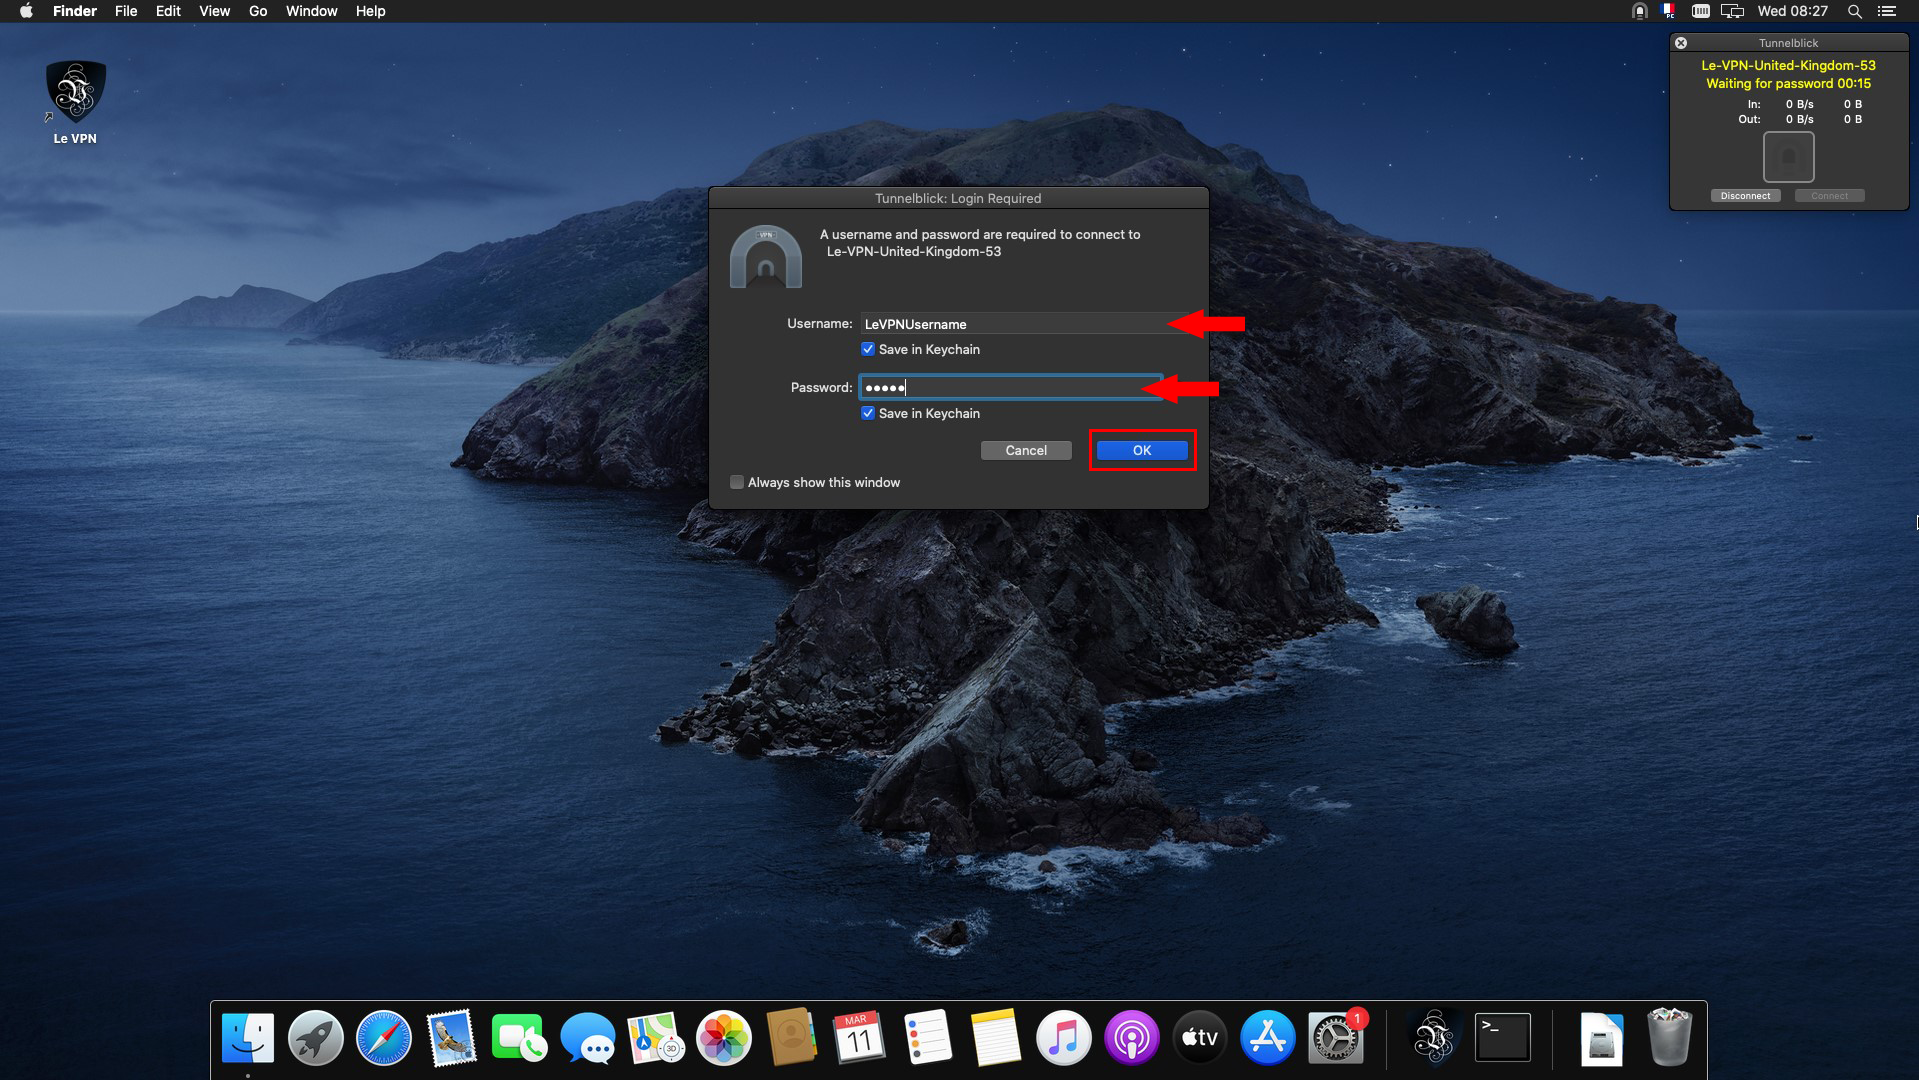
2) Enter your VPN username and associated password, check the "Save to Keychain" boxes and click "OK".
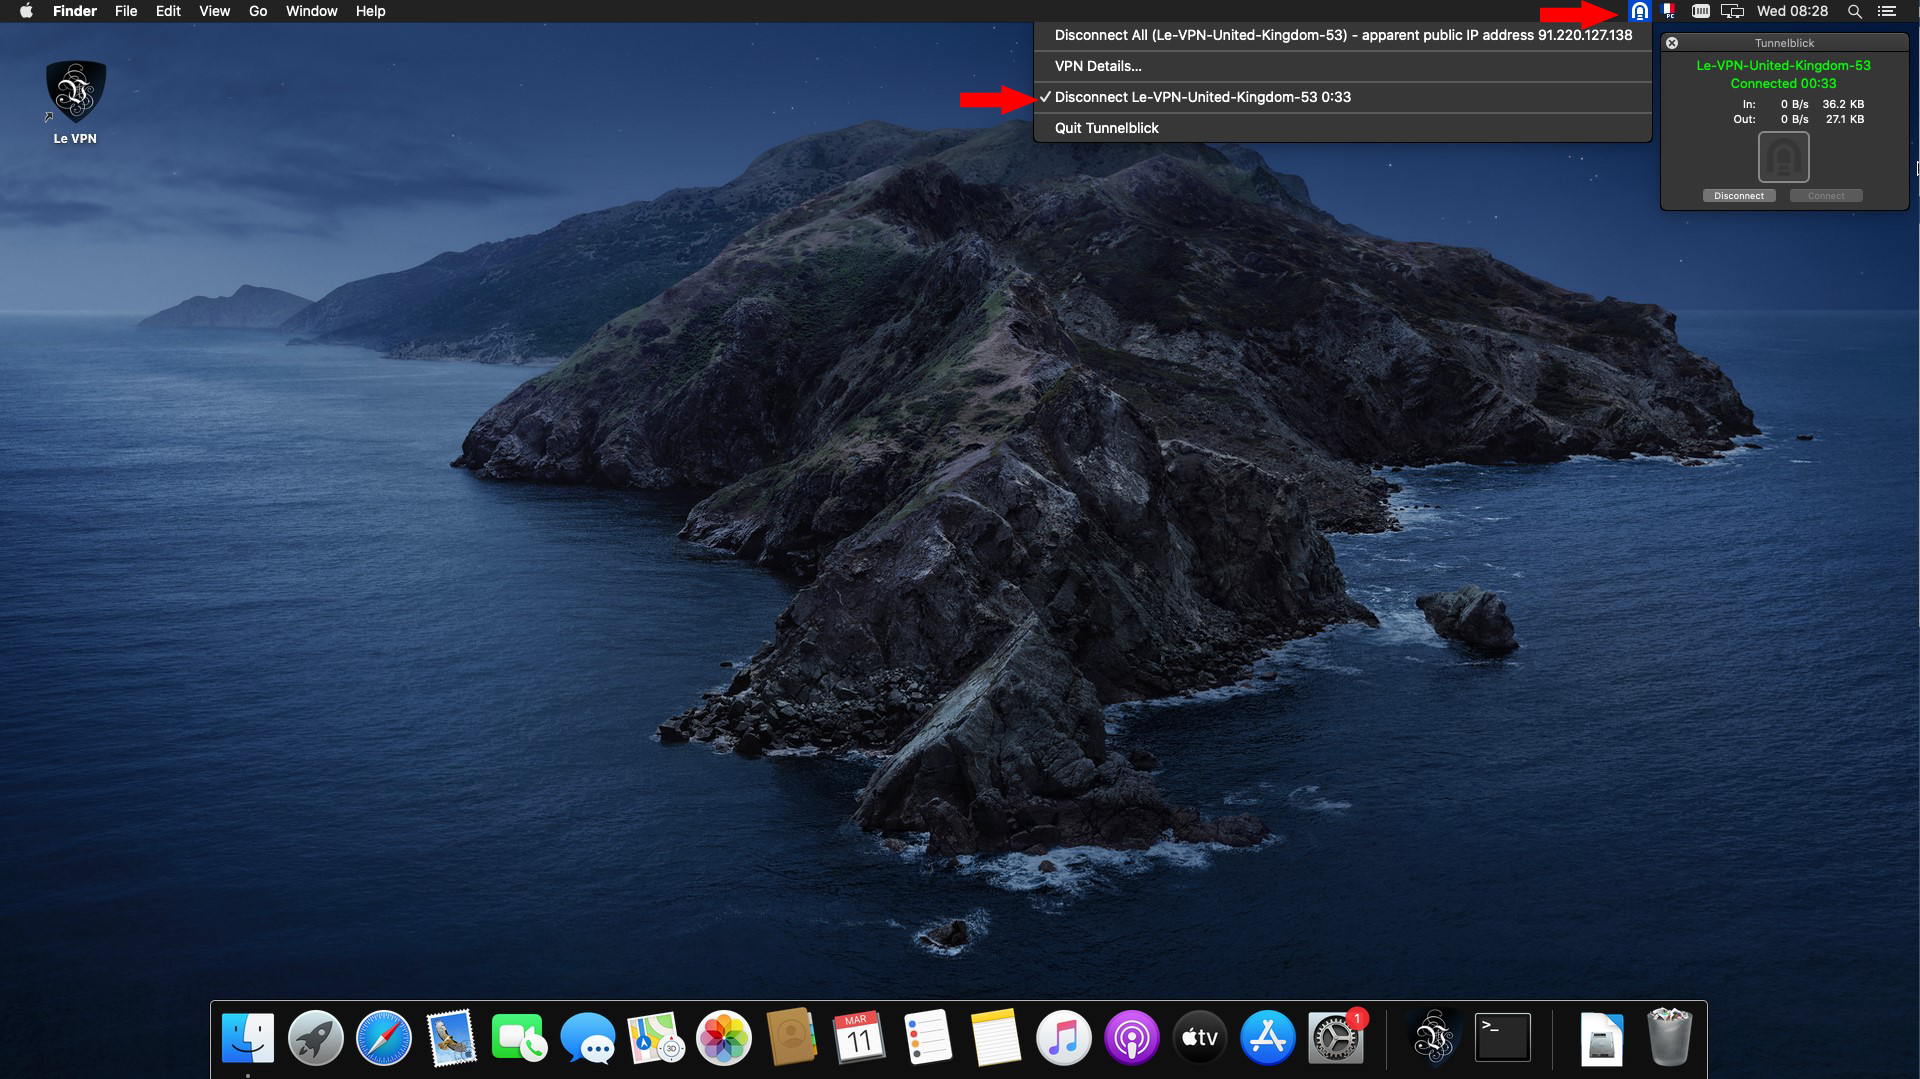
3) Once connected, the Tunnelblick icon turns white.
Disconnection
1) To disconnect, click again on the Tunnelblick icon at the top of the screen, and choose "Disconnect Connection Name".
If you need any further assistance, please contact us via Live Chat or submit a ticket to our support team.
